MailChimp
What is MailChimp?
MailChimp is an email list and automation service. You can use it to collect contact form or gated content form submissions and send automated email series to continue nurturing contacts.
MailChimp should ONLY be used if the client does not have the means to purchase a Hubspot instance and has no other marketing automation software in use. PLEASE check with the client to confirm if they have a tool in use or not. Sometimes they do not tell us about their existing tools. Do not encourage clients to downgrade to MailChimp if they have a Hubspot instance already.
How to Set Up a New MailChimp Account
Please note: You will need to be added as a user to both the TSL account and any clients you'll be working on inside MailChimp.
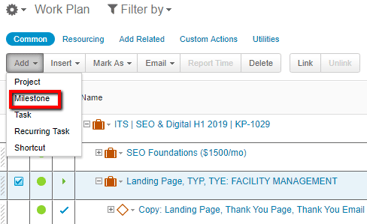
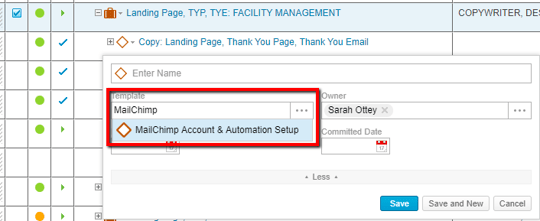
Manager: Assign out the templated Clarizen tasks for the process outlined below by loading the Milestone template called "MailChimp Account & Automation Setup" into a related subproject (Landing Page, Strategist Support).
| Step # | Owner | Time | Action |
| 1 | Project Lead |
To complete MailChimp account set ups, request the following from the customer:
|
|
| 2 | Strategist |
Create an account for the client. MailChimp https://mailchimp.com/ |
|
| 3 | Strategist |
Send an email to the client and/or the person who's email address you used to set up the account. Use this template: "Hi [First Name], |
|
| 4 | Strategist | Once they have completed verification, prepare to add their client account to TSL's agency account. Log into TSL's agency MailChimp account. |
|
| 5 | Strategist | Go to the top right drop down, click "Account." Go to the "Clients" tab. |
|
| 6 | Strategist | Click "Add a Client." | |
| 7 | Strategist |
Insert the client account's email and include this message: "Hi, |
|
| 8 | Strategist | Once you have access, on the Clients page, manage users and add all TSL users to access the client's account. | |
Finishing Account Automation Setup & Creating a Thank You Email
You should set up a welcome email that is sent to the new subscriber automatically when they sign up. You can create an automated workflow to do this.
| Step # | Owner | Time | Action |
| 1 | Log into the agency MailChimp account. | ||
| 2 | Navigate to the client's account by going to the top right drop down. | ||
| 3 | Navigate to the settings of the list that needs a thank you email. | ||
| 4 | Click "Create" button and select "Email." | ||
| 5 | Select "Automated" and then "Welcome new subscribers." | ||
| 6 | The "Campaign Name" is the name of the email for internal use. Format the name of the email as such: [Name of List] - [Name of Email]. Example: "General Contact Form Submission - Thank You Email" |
||
| 7 | Select the list that this follow up email should be associated with. | ||
| 8 | Edit the "Trigger" setting to be set to immediately. Save. | ||
| 9 | Click "design email." | ||
| 10 | Enter the name of the email again. | ||
| 11 | Edit the sender information and the subject line. | ||
| 12 | Choose a template from the "Save Templates" tab or select a layout with full width one column. | ||
| 13 | Insert the body copy from what copywriter has provided for the "Thank You Email" copy. | ||
| 14 | Use the "content" and "style" tabs in the editor to edit the copy and design of the email to branding guidelines. | ||
| 15 | Send yourself a test email to review and QA the email. | ||
| 16 | Click "Next" when the email or email series is ready. | ||
| 17 | If everything looks correct, click "start sending." |
You can find additional support documentation here.

